This drawing tool is very straight-forward and works like virtually all other NinjaTrader drawing tools. Once installed, simply select 'AB-RaffChannel (version)' from the drawing tools drop-down menu to use it. Click once to set the channel starting point and click again to set the channel ending point. Click and drag on an anchor to change the channel start or end points and click and drag the channel lines to move the entire channel. If you right-click on any channel line you can access the channel's properties and alerts. I tried to give all the options names that make sense and, if you hover over them with your mouse, I've included more detailed descriptions as appropriate. Overall, I don't think there's too much that's a mystery. However, this page will provide an overview just in case something doesn't make sense to you.
Download Instructions
You can download the latest version of AB-RaffChannel here . Make sure you save the file somewhere you can find it easily -- your Downloads folder or your Desktop are usually the easiest places. If you wish to verify your download, the SHA-256 checksum is displayed below the download button for each release on the Downloads page.
Installation, Upgrades & Removal
installation
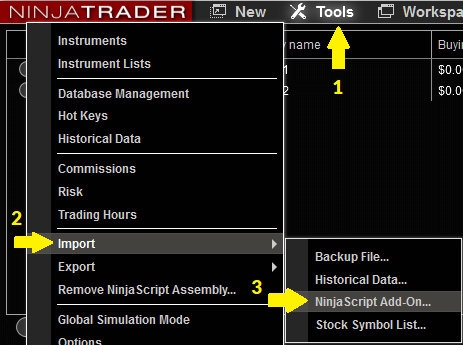
Open NinjaTrader and go to the main control window (the one with the main program menu) and select Tools | Import | NinjaScript Add-On... [Installation screenshot 1]
Navigate and find the ZIP file you downloaded. Select it and click "Open". NinjaTrader will install the file for you.
Assuming there are no errors, you should see a dialog box saying "NinjaTrader successfully imported all scripts contained in the NinjaScriptArchive File." [Installation screenshot 2]
That's it, you're done!
upgrading
Upgrading involves removing the previous version and then installing the new version just as you did in the initial installation.
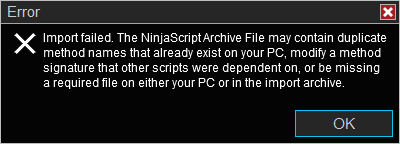
You MUST remove the previous version or NinjaTrader will fail to perform the upgrade. If you don't remove the previous version, you will see a dialog box saying "Import failed..." [Screenshot showing upgrade error]
Follow the steps in the "Uninstallation" section below to remove the current (old) version.
Now, follow the steps in the "Installation" section above to install the newest version. Just make sure you choose the newest ZIP (it will have the highest version number) and that will do the "upgrade" for you. Upgrading really is just installing the latest version. Your existing templates will be unaffected and will be automatically reapplied after the upgrade.
removal
It is recommended you remove any custom indicators from within NinjaTrader instead of deleting the file manually (though I've never experienced any problems manually deleting files). We will go through the recommended procedure here.
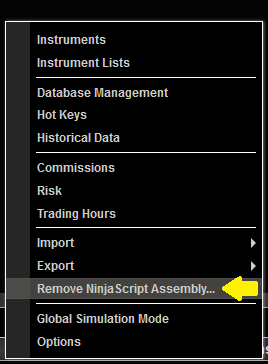
On the main NinjaTrader Control Center window (the one with the main program menu), select Tools | Remove NinjaScript Assembly [DLL uninstallation screenshot 1]
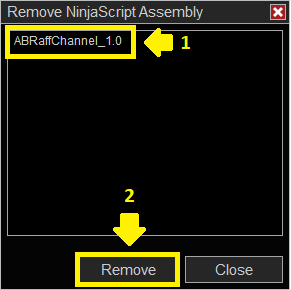
A new window will appear asking you to select which assembly you want to remove. Select ABRaffChannel_version (where '_version' is the currently installed version number) and click "Remove". [DLL uninstallation screenshot 2]
NinjaTrader will display a confirmation dialog box asking if you're sure. You are. Say Yes.
Assuming no errors, you will get a success message. Click OK to close the dialog box. [DLL uninstallation screenshot 3]
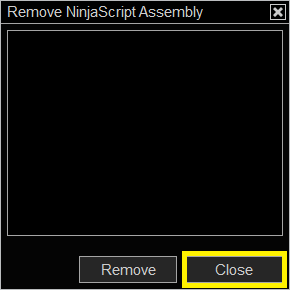
Click CLOSE on the "Remove NinjaScript Assembly" dialog box to close it. [DLL uninstallation screenshot 4]
AB-RaffChannel is now uninstalled. If you removed the indicator as part of the upgrade process, please follow the "Installation" section above to complete the upgrade.
Using In NinjaTrader
This drawing tool appears along with all other NinjaTrader drawing tools in the same 'pencil' drop-down menu. It follows the standard drawing tools usage rules, but, here's a more detailed breakdown:
adding to your chart
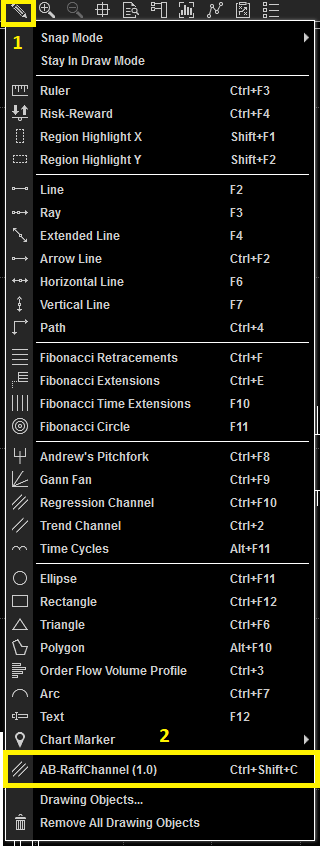
Open the drawing tools drop-down menu or open the context-menu and find AB-RaffChannel (version). [Screenshot of drawing tools menu]
Click to select the tool and change your cursor to a pencil. Click on your chart where you would like the channel to start then move your mouse to where you would like the channel to end and click the mouse again. The regression line will be calculated between these two points and your channel lines will be updated and drawn.
interaction
Clicking on any channel line will select the channel. Clicking on any channel line (including the regression line) and dragging the mouse will move the entire channel. Clicking and dragging on an anchor will change the start or end point for the channel and regression calculation. Double-clicking on any channel line will open the properties grid. Right-clicking on any channel line will open the context menu and allow you to open the properties grid, set alerts or remove the channel. You can also remove the channel by selecting it and pressing the delete key on your keyboard.
assigning a hot-key
If you want quick access to the drawing tool, you can assign it a hot-key:
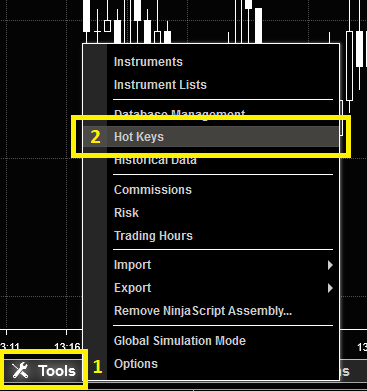
In the NinjaTrader Control Center (main window), click on Tools | Hot Keys. [NinjaTrader Tools menu].
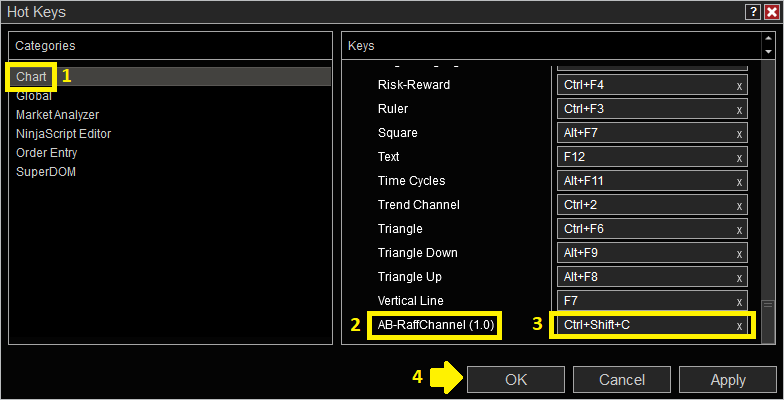
In the new window that opens, select Chart on the left side.
On the right side, scroll all the way down until you see AB-RaffChannel (version). [Hot Keys dialog box].
Click on the empty box to the right and enter the hot-key combination you'd like to use for this drawing tool.
Click OK to close the dialog box and save your changes.
alerts
Alerts are handled using the built-in NinjaTrader alerts system. Right-click on your channel and select Alerts. This will bring up the NinjaTrader alerts dialog. More information about the alerts system can be found in the NinjaTrader official documentation . The alerts dialog is pretty complicated so you might find this YouTube video about NinjaTrader alerts or this YouTube video with some alert examples helpful.
Parameters
Click on any of the options below to expand it and read a more detailed explanation of what the particular parameter does. This section will be updated with each new release version.
calculation options
display options
Line Styles
General
contact me
Want to stay updated on new releases? Have questions or found a bug? Want to submit a feature request? Feel free to email me by clicking the button below. I'll be happy to answer any questions you have, help you get the indicator set-up, or let you know about incorporating your suggestion(s) into future versions. If you know how to program for NinjaTrader or in C#/.NET in general and want to contribute, email me using the button below or file an issue or pull request in the git repo (preferred).
email me

